


It doesn't get more Christmassy than this: this is how you make your own Christmas wreath
A Christmas wreath on the front door—that's what truly makes Christmas special. Of course, you can always use a ready-made wreath, but making it yourself… that's just the right touch.
Here you can read step by step how to make a full, festive wreath. With smart tips so that it stays beautiful longer and you can enjoy that ultimate wreath for as long as possible. Christmassy realm.
-
Fresh green: Wreaths with boxwood, ivy or pine last 3–6 weeks.
-
Mixed green: with eucalyptus and berries, for example, about 2–4 weeks. Eucalyptus dries out faster, but that gives it a cozy, natural look.
-
Only dried: reusable for next year!


Tips for a longer life: Spray lightly with water (only in mild weather), do not hang the wreath in full sun and combine fresh greenery with dried elements for a longer life

-
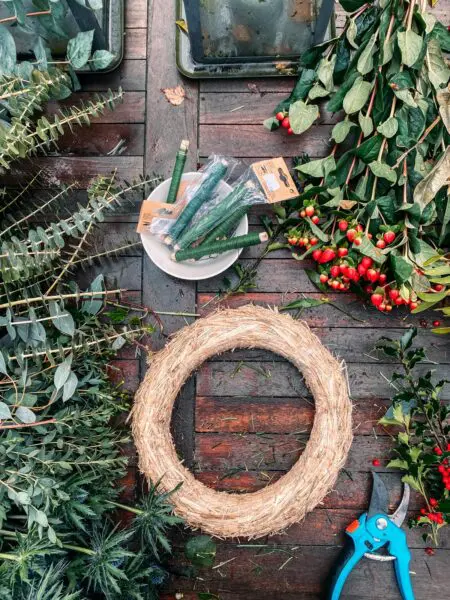
Straw, moss or foam wreath (the base)
-
Metal wire or binding wire
-
Twine or ribbon (for hanging and decoration)
-
Pins (U-shaped pins)
-
LED lights (optional)
-
Pruning shears
-
Green and decoration: branches, berries, pine cones, flowers.
Do you have a garden? Jackpot!
-
Get all the materials ready
-
Cut the greenery into 15–20 cm pieces or observe the process and adjust along the way (the latter is a matter of personal preference)
-
Roll out the wire and place the pins in a container
- Don't forget to prepare a glass of wine or coffee (depending on the time) and something tasty – that's how making the wreath becomes really enjoyable.


Get started under supervision? At Pillows Maurits at the Park This year, the traditional Christmas wreath gets a French perfumed edge. November 25 is coming Diptyque namely, not only spreading its delightful fragrances but also lending a hand with the finest Christmas wreath making. Under expert guidance, you assemble a festive wreath while Sapin cocktails and snacks are served. You also get to take a scented candle home with you. And should the wreath happen to turn out a bit crooked, at least it will smell fantastic. Book the workshop here.


-
First, create a base: cover the entire straw wreath with greenery all the way around, creating a full, even base. Choose your strategy: work all the way around or from the bottom up, either clockwise or anticlockwise.
-
Creating bunches: Bundle a few branches and secure them with floral wire or U-pins. Work in a circular motion (using the floral wire and concealing it well among the greenery): each new bunch overlaps the previous one.
-
Use pins to provide extra strength or to secure loose berries.
-
Check that everything is properly secured
-
Trim any protruding branches to keep the wreath nice and round
-
If desired, wrap LED lights through the wreath (secure the battery at the back with the pins)
- Hang it with a beautiful ribbon on the front door or with a door hanger


More tips
-

All the tastiest Christmas recipes from Maddie's Foodlife on the table
-

From Christmas to New Year's: this is how Amsterdam's five-star hotels celebrate the holidays
-

Christmas lunch at Restaurant Voltaire*: six courses at Culinary Estate Parc Broekhuizen in Leersum
-

The Christmas cookbooks for holiday inspiration
-

Great idea: dim sum from the iconic Sea Palace, Amsterdam (but at home, via Crisp)
-

Early Christmas at Tapas Restaurant Barça in Amsterdam
-

Eating out at Christmas: these restaurants are open in Amsterdam (2026)
-

Into the kitchen: a 3-course Christmas dinner by Bibi Loomans
-

A tree full of beautiful baubles: the most beautiful Christmas baubles for in (and under!) the tree
-

The best thing to do before, during and after Christmas